- 一、安装EPEL储存库
- 二、安装yum-utils工具
- 三、在CentOS 7中安装dnf
- 四、将CentOS 7升级到CentOS 8
- 五、为CentOS 8安装新内核
- 六、重启后通过以下命令确认引导版本:
一、安装EPEL储存库
首先,通过运行以下命令安装EPL存储库
yum install epel-release -y
在CentOS 7中安装EPEL Repo
二、安装yum-utils工具
成功安装EPEL之后,通过运行以下命令来安装yum-utils。
yum install yum-utils -y
然后,您需要通过执行命令来解析RPM软件包。
yum install rpmconf -y
rpmconf -a
如果出现一些提示就回车继续,如果没提示就继续:
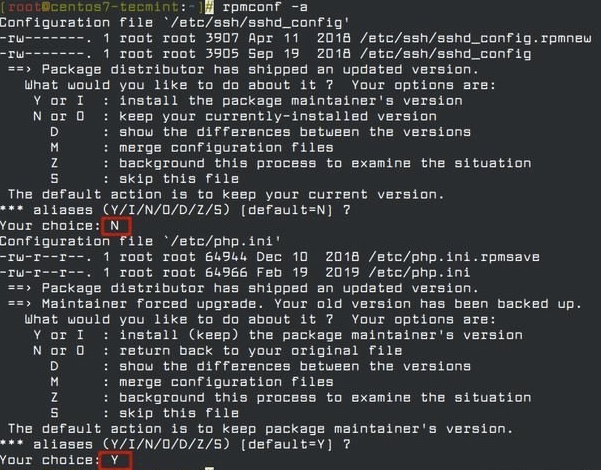
保留默认RPM设置
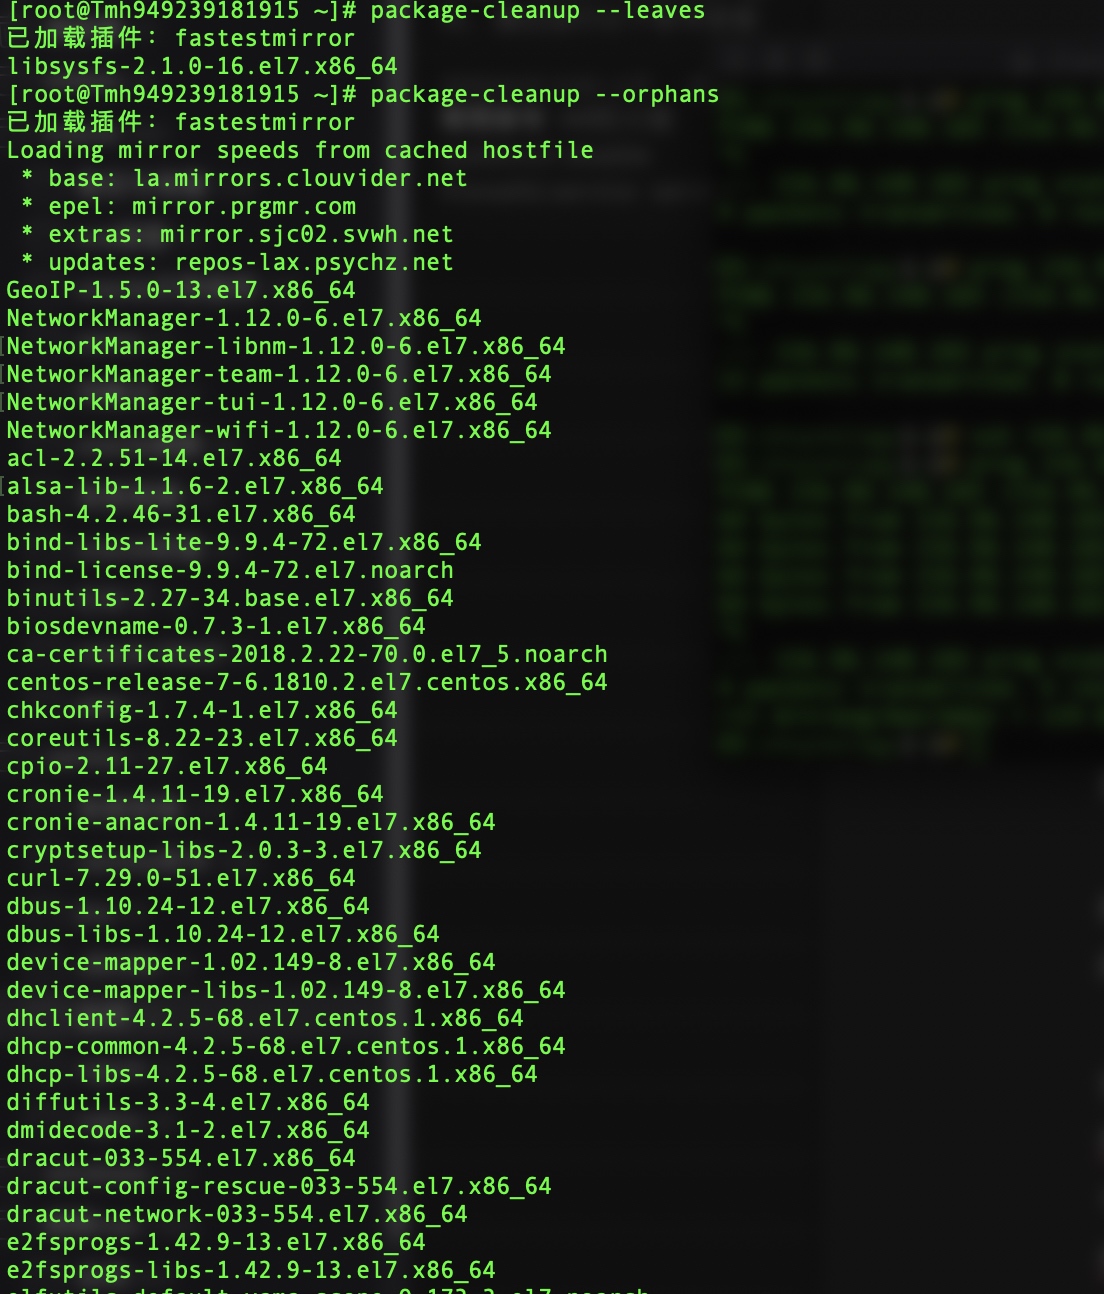
接下来,清理所有不需要的软件包。
package-cleanup --leaves
package-cleanup --orphans
三、在CentOS 7中安装dnf
现在安装dnf软件包管理器,它是CentOS 8的默认软件包管理器。
yum install dnf
在CentOS 7中安装dnf
您还需要使用以下命令删除yum软件包管理器。
dnf -y remove yum yum-metadata-parser
rm -Rf /etc/yum
四、将CentOS 7升级到CentOS 8
dnf upgrade
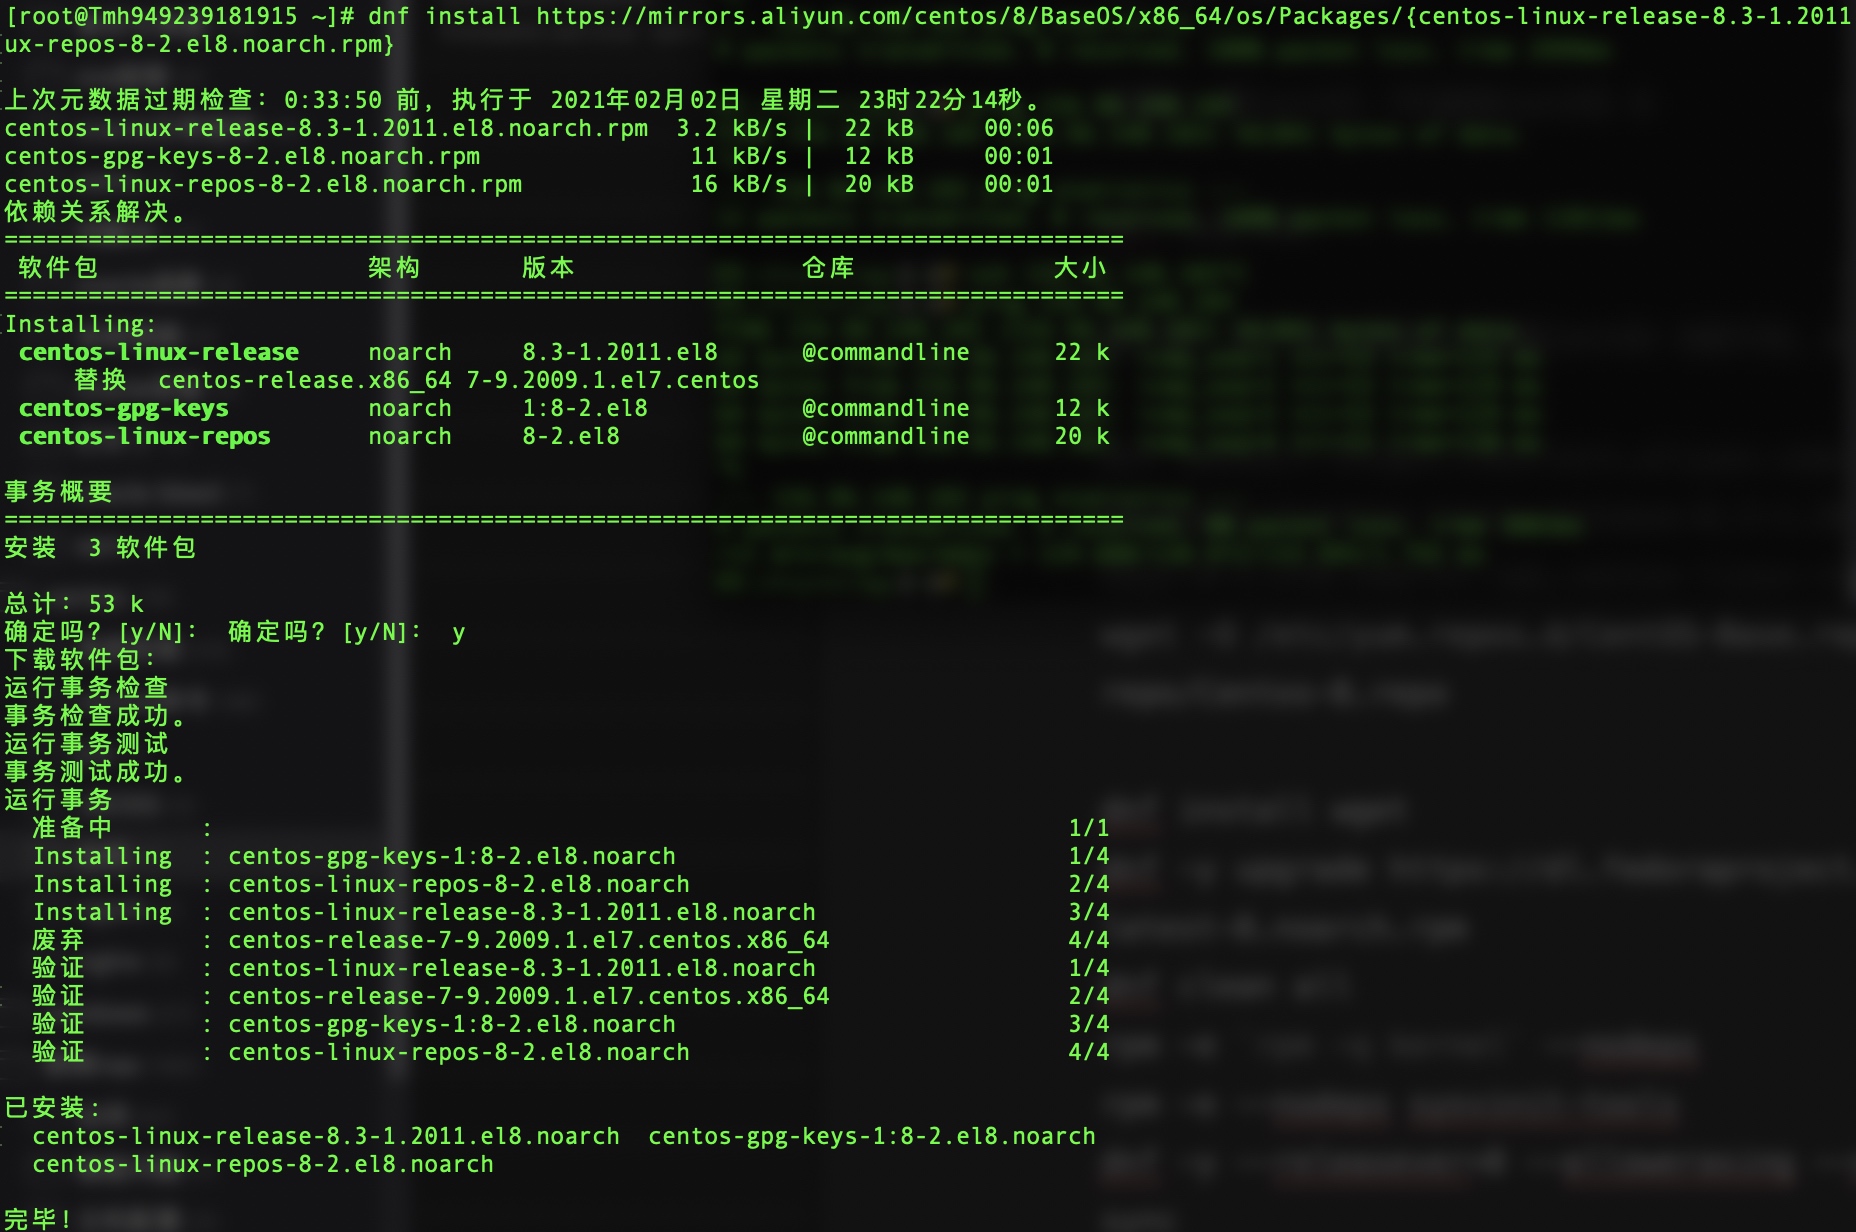
接下来,如下所示使用dnf安装CentOS 8发行包。这需要一段时间。
dnf install https://mirrors.aliyun.com/centos/8/BaseOS/x86_64/os/Packages/{centos-linux-release-8.3-1.2011.el8.noarch.rpm,centos-gpg-keys-8-2.el8.noarch.rpm,centos-linux-repos-8-2.el8.noarch.rpm}

wget -O /etc/yum.repos.d/CentOS-Base.repo https://mirrors.aliyun.com/repo/Centos-8.repo
接下来,升级EPEL存储库。
dnf -y upgrade https://dl.fedoraproject.org/pub/epel/epel-release-latest-8.noarch.rpm
成功升级EPEL存储库后,请删除所有临时文件。
dnf clean all
使用nodeps参数删除CentOS 7的旧内核。
rpm -erpm -q kernel--nodeps
接下来,请确保删除有冲突的软件包。
rpm -e --nodeps sysvinit-tools
启动CentOS 8系统升级,如下所示。
dnf -y --releasever=8 --allowerasing --setopt=deltarpm=false distro-sync
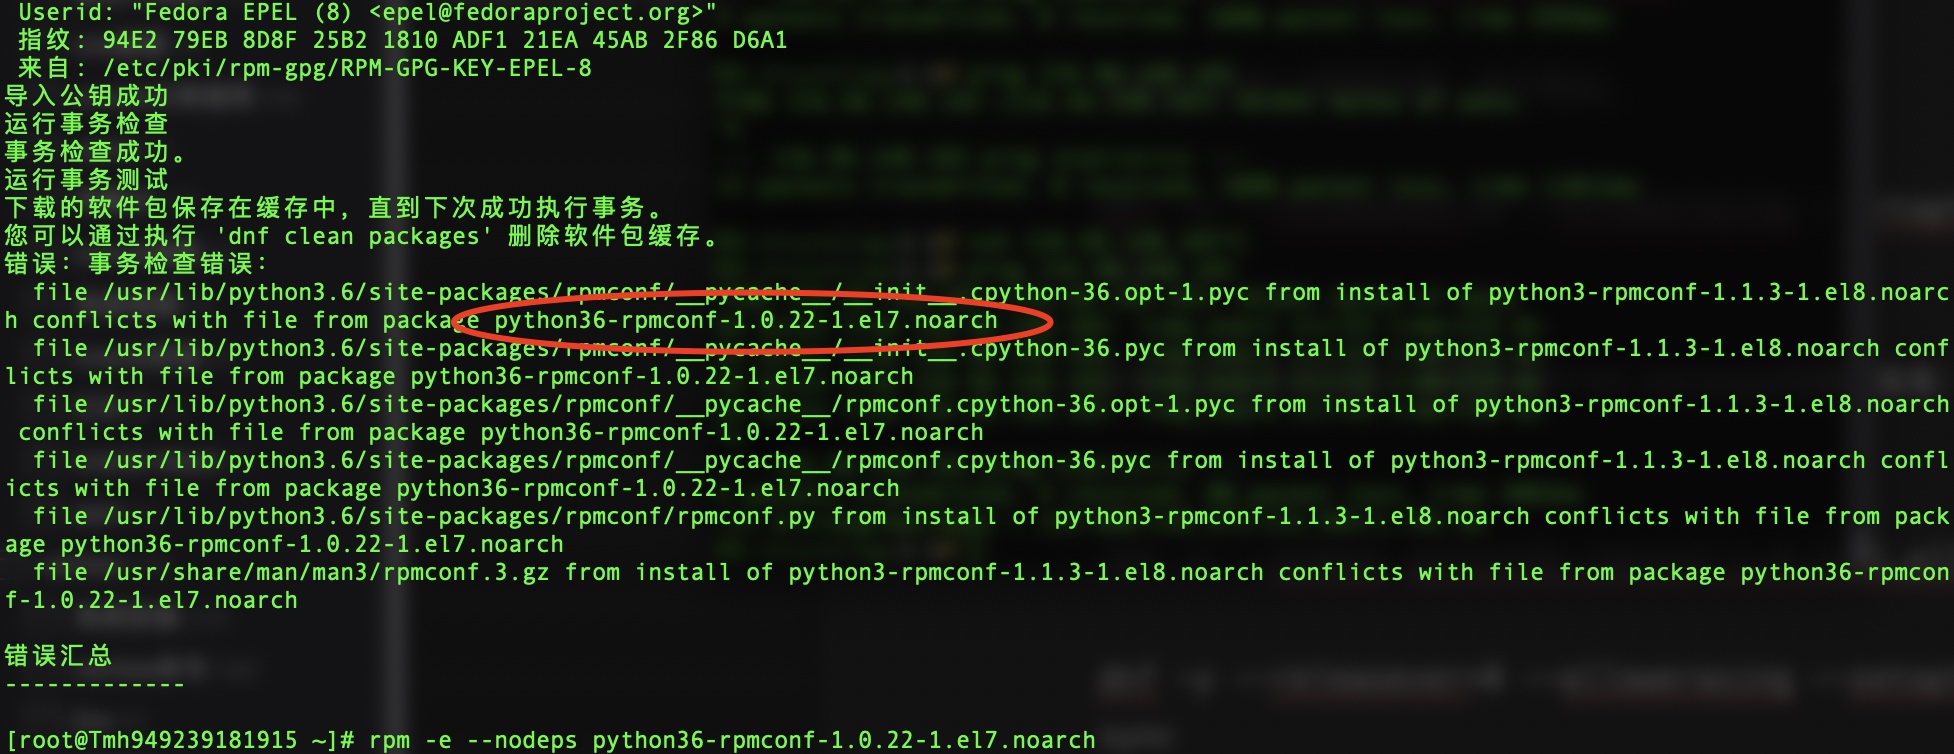
如果升级发现有报错,需要卸载from package后面的报名:
rpm -e --nodeps python36-rpmconf-1.0.22-1.el7.noarch
然后再次执行升级,此步骤需要等待较长时间。
dnf -y --releasever=8 --allowerasing --setopt=deltarpm=false distro-sync
五、为CentOS 8安装新内核
要为CentOS 8安装新的内核,请运行命令。
dnf -y install kernel-core
在CentOS 8中安装内核
最后,安装CentOS 8最小软件包。
dnf -y groupupdate "Core" "Minimal Install"
如果遇到yum安装失败可以通过以下方式解决:

cd /etc/yum
mv protected.d protected.d.bk
mv vars vars.bk
wget http://mirrors.163.com/centos/8/BaseOS/x86_64/os/Packages/yum-4.2.23-4.el8.noarch.rpm
rpm -ivh yum-4.2.23-4.el8.noarch.rpm
然后再尝试进行安装:
dnf -y groupupdate "Core" "Minimal Install"

现在,您可以通过以下命令运行检查安装的CentOS版本。
cat /etc/os-release
cat /etc/redhat-release
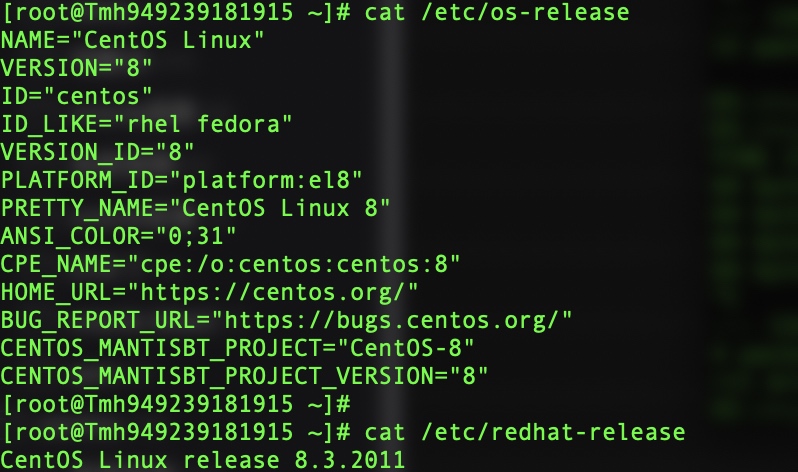
确认版本后重启
reboot
六、重启后通过以下命令确认引导版本:
grub2-editenv list
uname -a
